Windows 10 matches the regional time formats as prevalent in the set region. However, there are times when our choice differs from the region’s standard, or there’s a detection error. Whatever your reason be, let’s look at how we can modify the time formatting on a Windows 10 PC.
Enable or disable the AM/PM time format in Windows 10
One of my Windows 10 PC decided to force the 24-hour time format on me. And while switching it to the AM/PM format, I realized that it is not as straightforward as it should be. So, in case you’re in a similar boat, here’s a quick overview of the steps you will need to perform on your Windows 10 PC to switch your time format between 24-hour and 12-hour options.
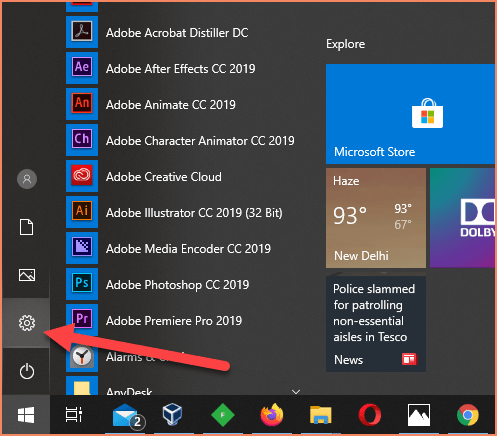
- Open the Settings app on your Windows 10 PC.
Press the Start button and then tap or click on the gear icon to launch the settings app.
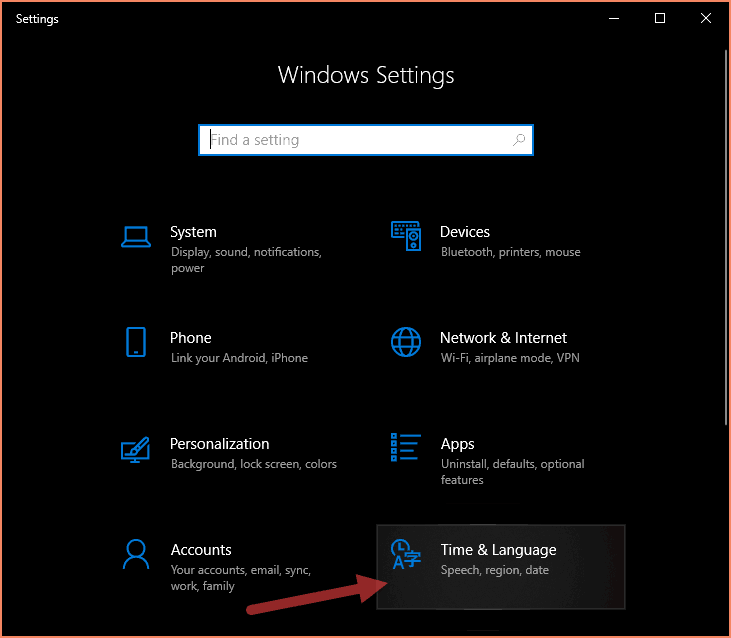
- Open “Time & language” settings
Click or tap on the “Time & language” option in the Windows 10 settings. Depending on your screen resolution and window size, the option may not appear within the first frame.
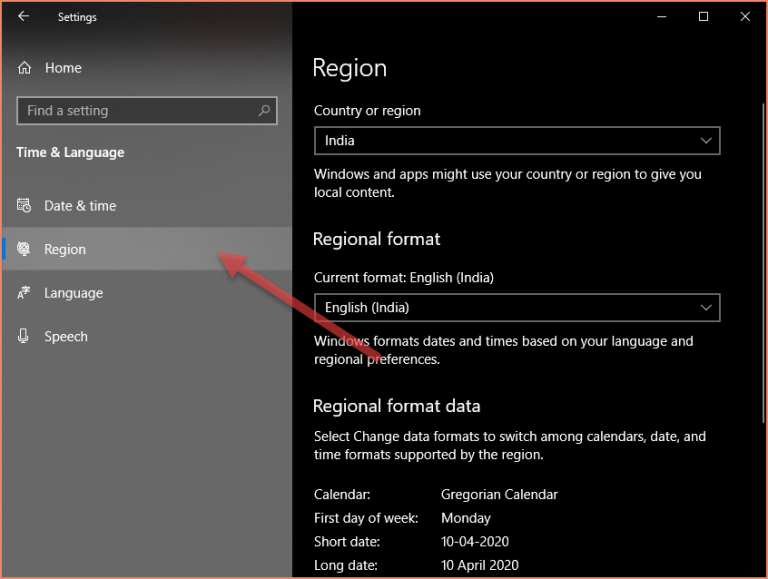
- Open the “Region” sub-setting option
Click or tap on the “Region” option on the left sidebar. It will take you to the page where you can choose the Region and regional formats.
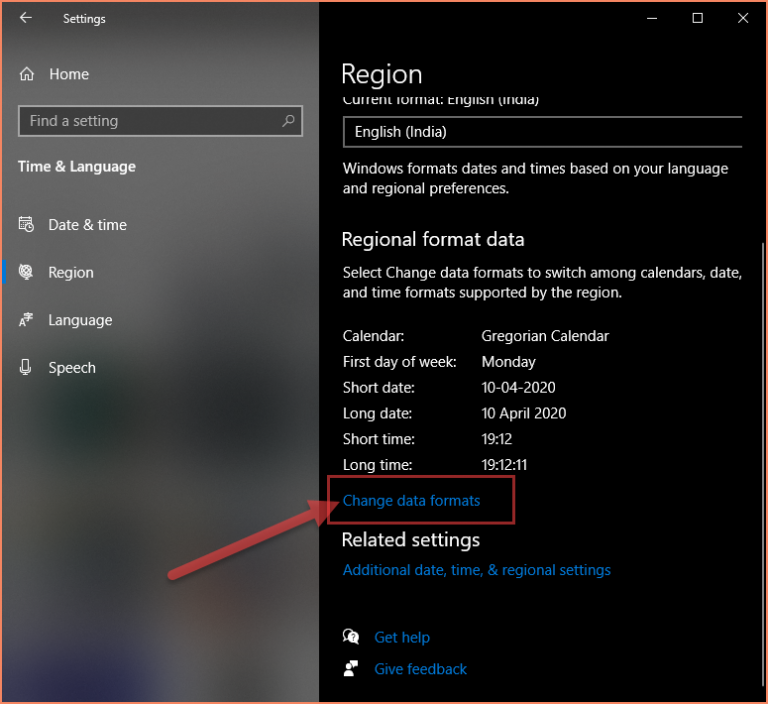
- Select “Change data formats”
Scroll towards the end of the Region settings and click on “Change data formats”.
- Change the values for short time and long time
In the final step, you need to change the values of the “Short time” and long time.
For the AM/PM format: Select the time with AM mentioned. E.g. 09:00 AM
For 24-hour format: Select the time without AM in it. E.g. 09:00 or 9:00 (per your choice)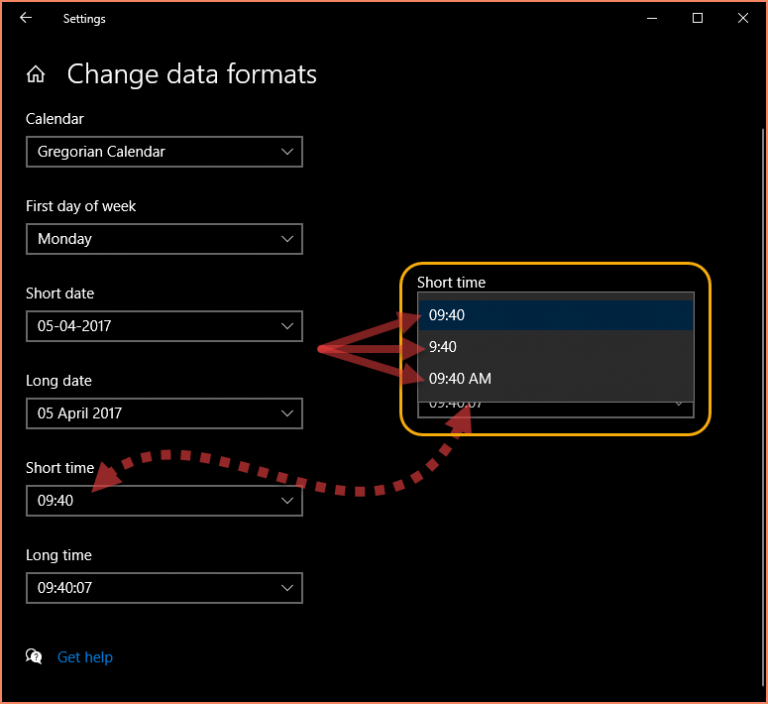
That’s it. The changes you make here will be applied instantly. This should be enough for a basic change. In case you need more control, then check out the “Region – Change date, time & number formats” item in Windows Control Panel.
Pretty simple, yet complex, right? It would have been way better if Microsoft gave a simple toggle at the Date & time settings page itself.

