Google Phone app has started rolling out the call recording functionality. Since all Nokia Android phones run on the Android One platform, the feature is slowly coming to Nokia phones as well. Now you do not need to install aftermarket apps which often provide unclear recording of voice calls. The following tutorial will guide you to record calls on Nokia phones. The same will also apply to the Google Pixel series of phones, OnePlus phones, and several other devices that use the “Google Phone” app.
Make sure that you have installed the latest version of the Google phone app on your Nokia. Soon after, the “record” button will show up in your in-call menu. In case you do not see it yet, then remember that the rollout is currently a phased process and not available immediately in all regions and on all devices. We tested the recording on a Nokia 7.2 and Nokia 2.2, both running on Android 10 while creating this content. We also tested it on a OnePlus Nord running on Android 11.
Notice: Recording calls without the consent of all the parties is prohibited in most regions. Keep that in mind before recording. Also, to keep itself on the safe side, Google will play a recorded disclaimer to the other side “This call is now being recorded”.
How to start/stop call recording?
- Ensure that you have installed the latest version of the Google Phone app (Play Store link).
- Make a phone call.
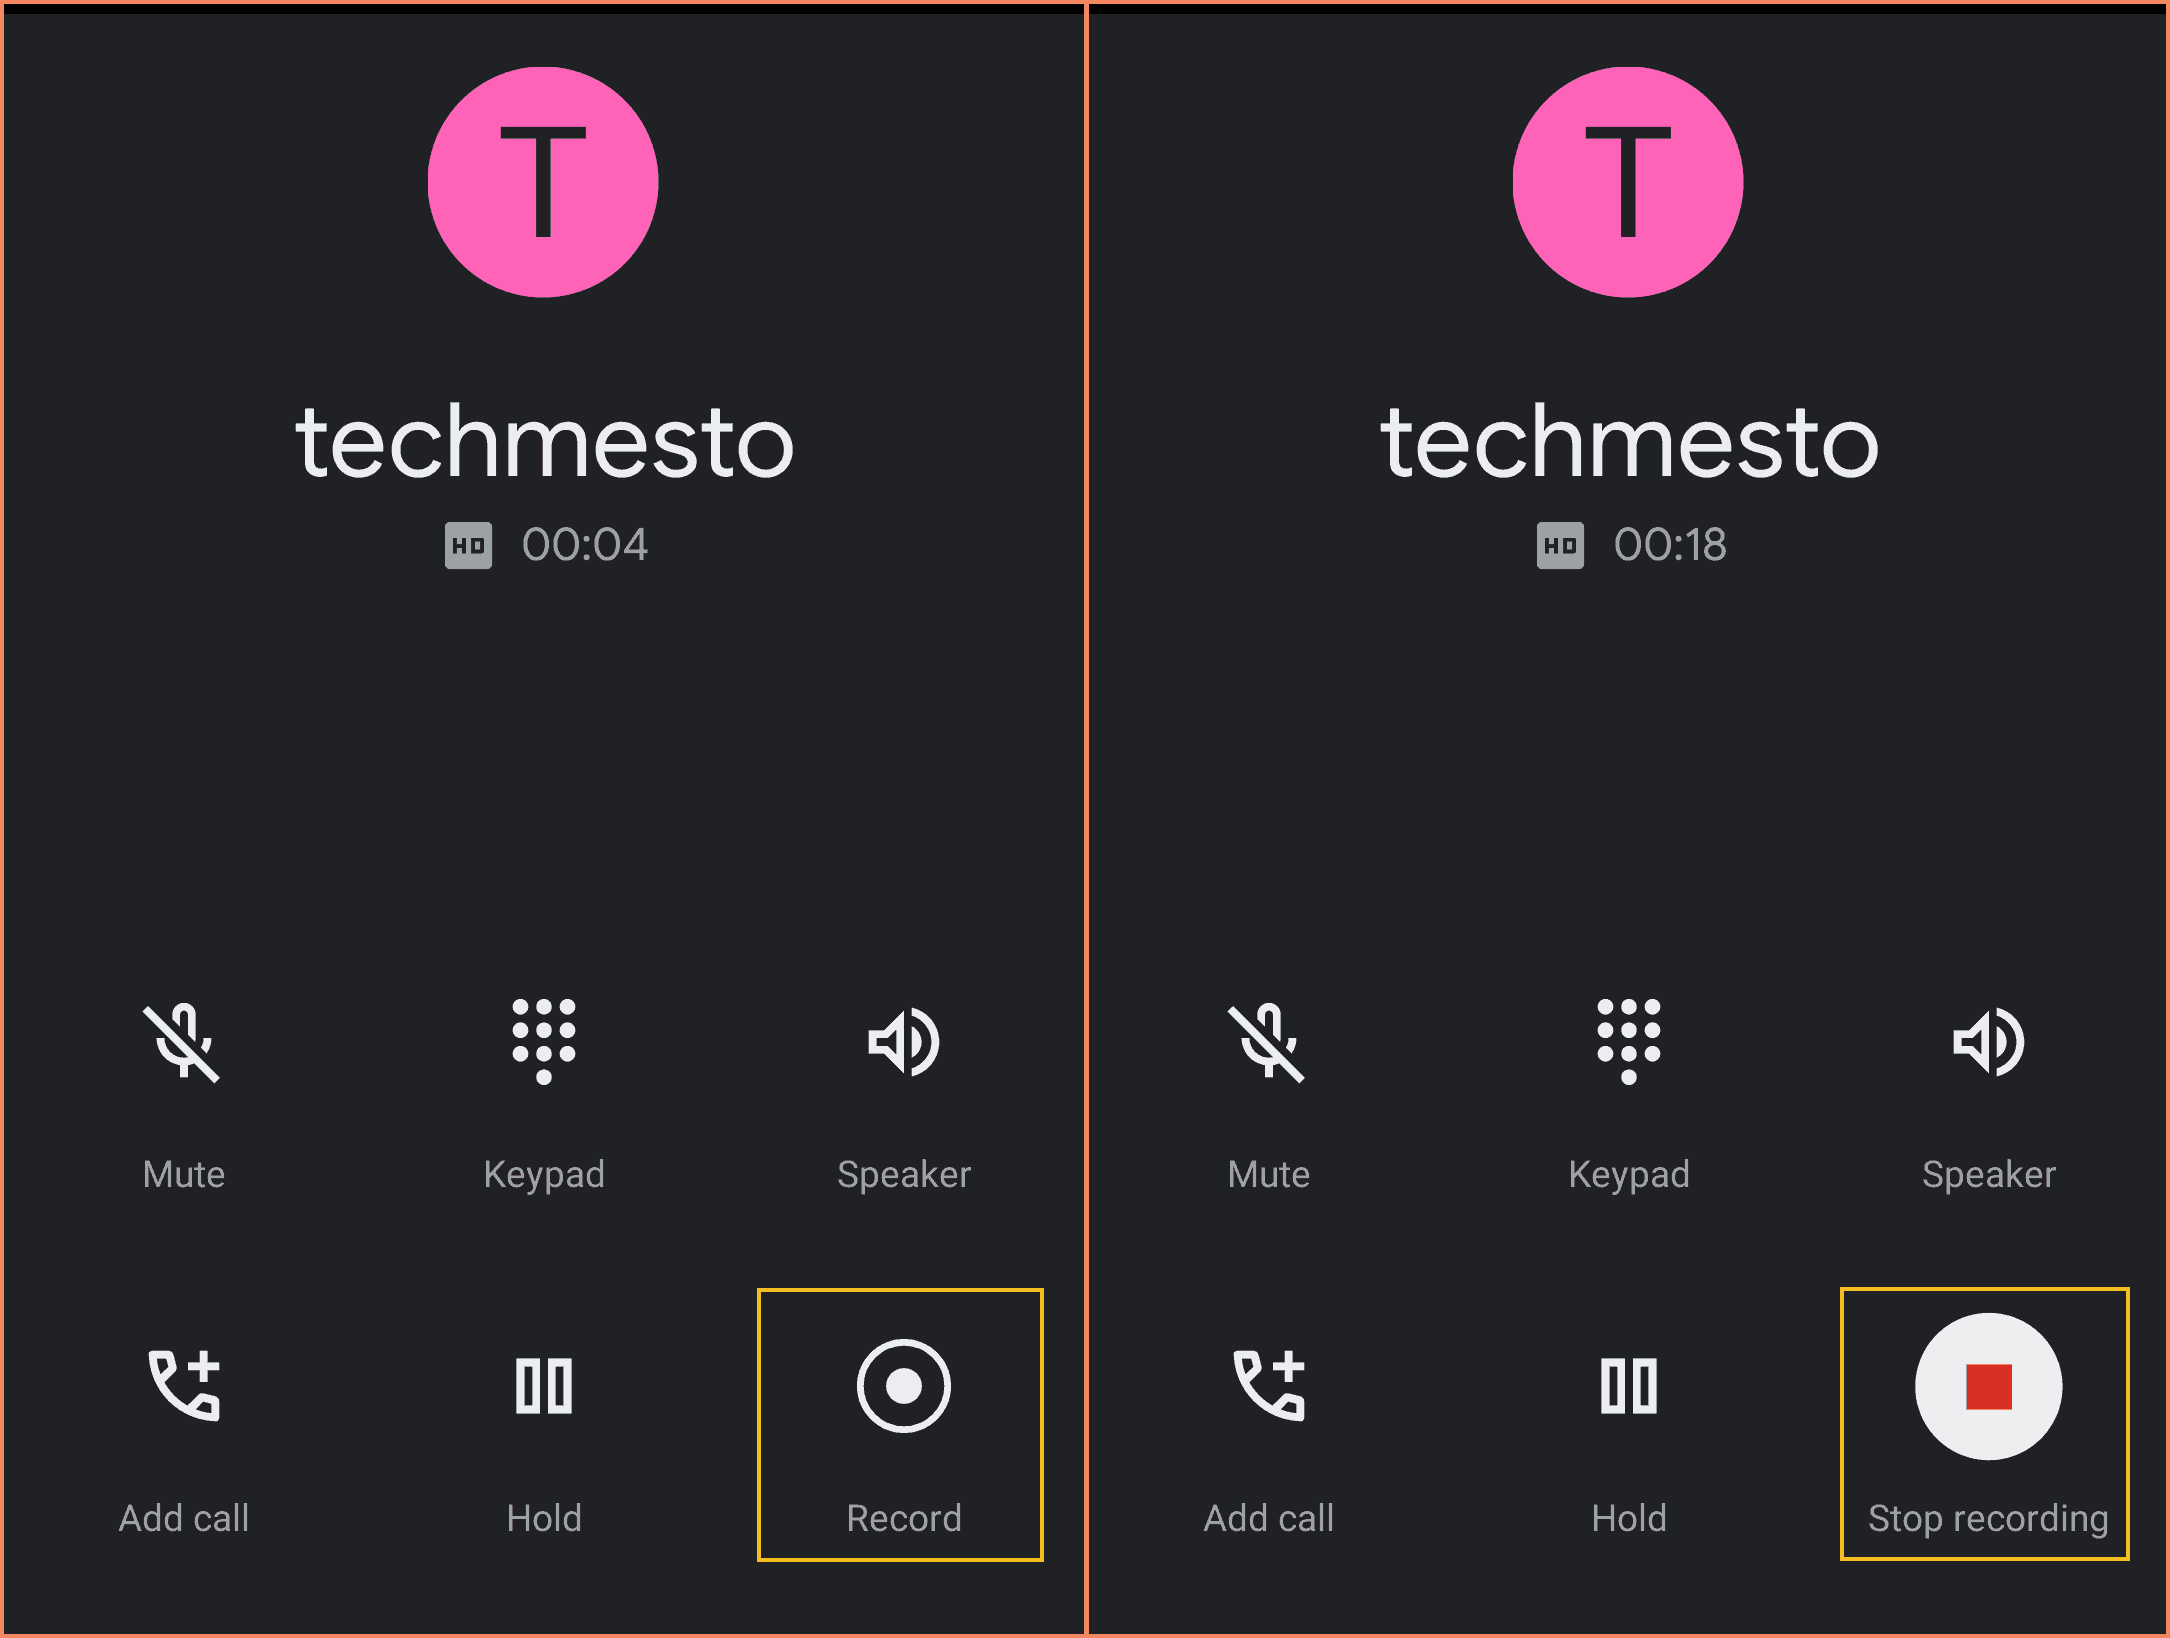
- You will notice a “Record” button on your in-call menu. Tap on the button to start the call recording. You can only start the recording when the other side has picked up (answered) the call.
- Tap on the “Stop recording” button when you want to end the recording. The app will playback another disclaimer (Recording has now ended) to the other side and then save the recording to your phone. Alternatively, you can also disconnect the call which will automatically save the recording.
Enable automatic call recording (unknown callers or specific contacts only)
Google has released a new update for the Google Phone app that enables the automatic call recording feature. That is, the phone will automatically start recording the calls as soon as you or the other side picks up the call. Here’s how to enable the feature.
- Open the Google Phone app.
- Tap on the 3-dots to open the options menu. Then tap on Settings.
- Tap on “Call Recording” to open the recordings sub-setting.
- Enable the toggle in front of Numbers not in your contacts and then confirm the change in the confirmation box that pops up.
You can further refine which calls get recorded by making use of the additional options. These are:
Specific numbers: You can use this option to always record calls from/to the contacts that you choose. So, tap on the “+” button and select all the contacts for whom you want to do automatic call recording.
Unknown callers: Only those calls will be auto-recorded for which you have not saved the number to your contacts.
Specific contacts: If you want to auto-record calls only from a specific contact, then you can select this option. Thereafter tap on the “+” button to start adding contacts for which automatic call recording should take place.
How to access, play and share call recordings?
Where are recordings saved? The call recordings are stored within the Phone app. You cannot access them using file manager apps. However, in case you have root access, then you can find the saved files (wav) in /data/data/com.google.android.dialer/files/callrecording
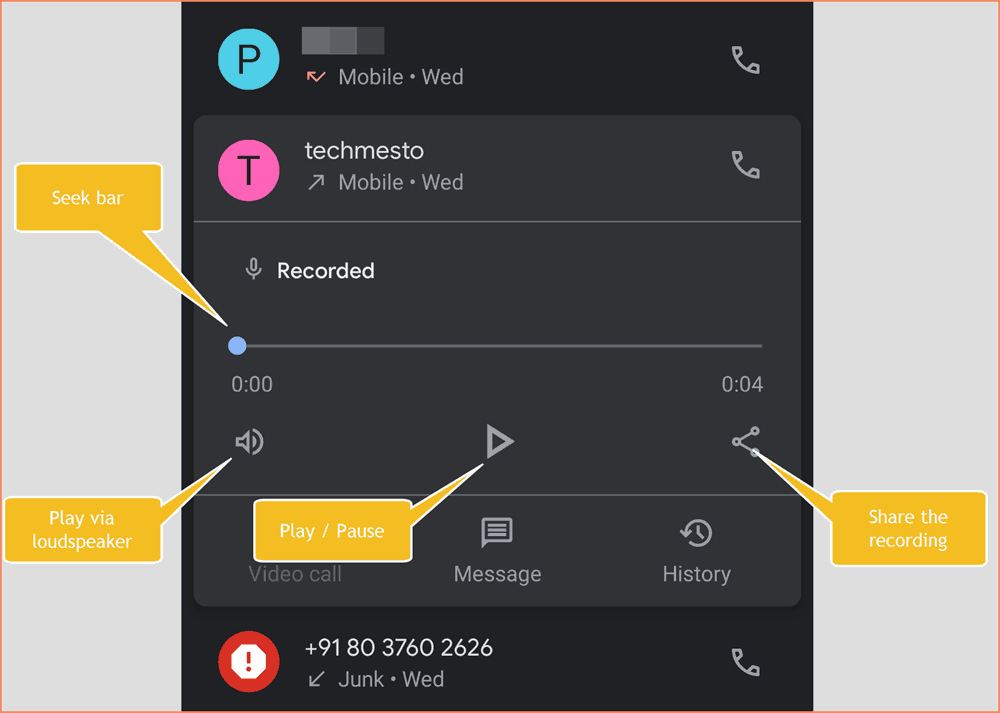
How to access recordings: You can access your recorded calls within the Phone app. Tap on the contact/number for which you have just completed a recording. You will notice an inline player along with the loudspeaker & share buttons.
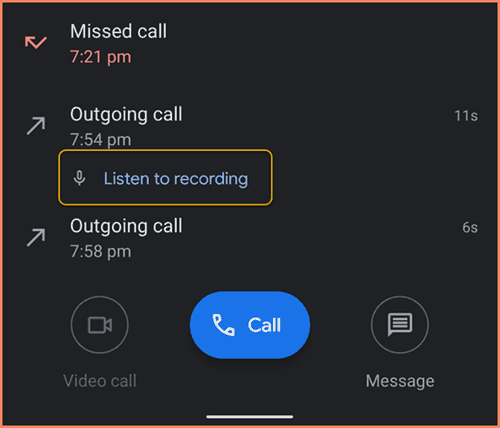
Access past recordings: If you want to find the historical records, then you need to tap on the contact and then tap on “history”. Here, you will find the “Listen to recording” for a call that you have recorded. The recording will play along with a share button, which will allow you to share the call recording.
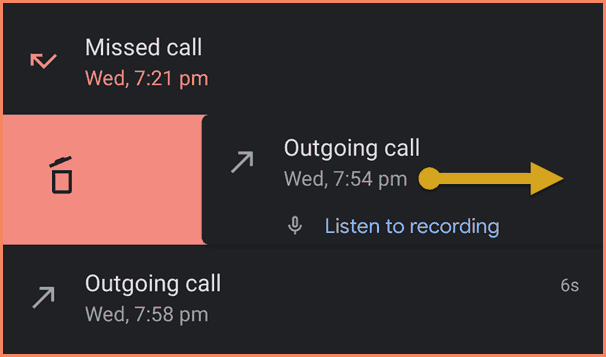
Delete recorded calls: You can quickly delete all recorded calls by heading right here: Google Phone app > Options > Settings > Call recording > Delete all recordings now. Alternatively, you can delete a specific recording by deleting that call record from the call history. For that, open the call history and swipe away the entry (see screenshot below)
Here’s hoping that you have got a thorough idea about how you can record phone calls on Nokia phones. Feel free to comment down below for any questions or feedback about the recording feature.
The news about the availability of a native recording option is big because even though Google is the developer of Android, other OEMs have been delivering countless additional features (including recording) for years and it is only now that Google has somehow considered the necessity of recording ability.




How to transfer recorded files to SD card?
You cannot do that. You will have to share each one separately via an app that can handle audio files.
in my 6.1plus whenever j use call recording other side(to whom the call is made or from which call is received) also hear the voice that the call is now being recorded. what s the use if another person know if i am recording the call
Is using Google Phone or a custom dialer from Nokia?
Nope. Not working in my nokia 2.2 (Android 10). What Phone app version are you using?
Hi, the call recording is only available in a few regions for now. I believe currently only India is known 🙂