You’ve made the perfect choice to install a SSD (solid state drive) on your laptop. You will certainly receive a performance boost since SSD has faster read/write speeds and lower response times. If you have just installed the SSD, then you might be wondering what’s next. The system won’t gain anything unless the operating system is loaded from the SSD. And you certainly do not want to do a clean install of Windows, because that’s a time taking process. So what is the solution?
The solution is to simply clone your existing hard disk over to the new M.2 SSD. Hence, keeping up the partitions and files exactly as they were. You can then simply set your BIOS or UEFI to boot from the SSD and you’re good to go. Here’s a step-by-step guide for you.
Copy Windows 10 to SSD by Cloning Hard Disk to SSD
PS: This content is written for laptops which have a M.2 SSD bay. If yours does not come with a M.2 bay and you are planning to (or have already) replaced your hard disk with a 2.5-inch SSD, then this won’t apply to you. What you need to do in such a case is to connect both the drives to the PC and then follow the guide.
Step 1 Free up space: Your SSD drive is most likely smaller in capacity as compared to your hard disk. So, in order to clone your hard disk to the SSD, you will need to free up space on your hard disk. You should only keep as much data as can be moved to your SSD. Else the cloning process will stop.Note: All data on the SSD will be lost. So, if you have copied some important data to the SSD, then you should backup the same before proceeding.
Step 2 Download and Install EaseUS Todo Backup: EaseUS has made a wonderful data backup tool as the Todo Backup. The free edition is enough for cloning the HDD to SSD. You can, however, plan to upgrade to the Pro version if you have interest in the pro functionality. Download link.

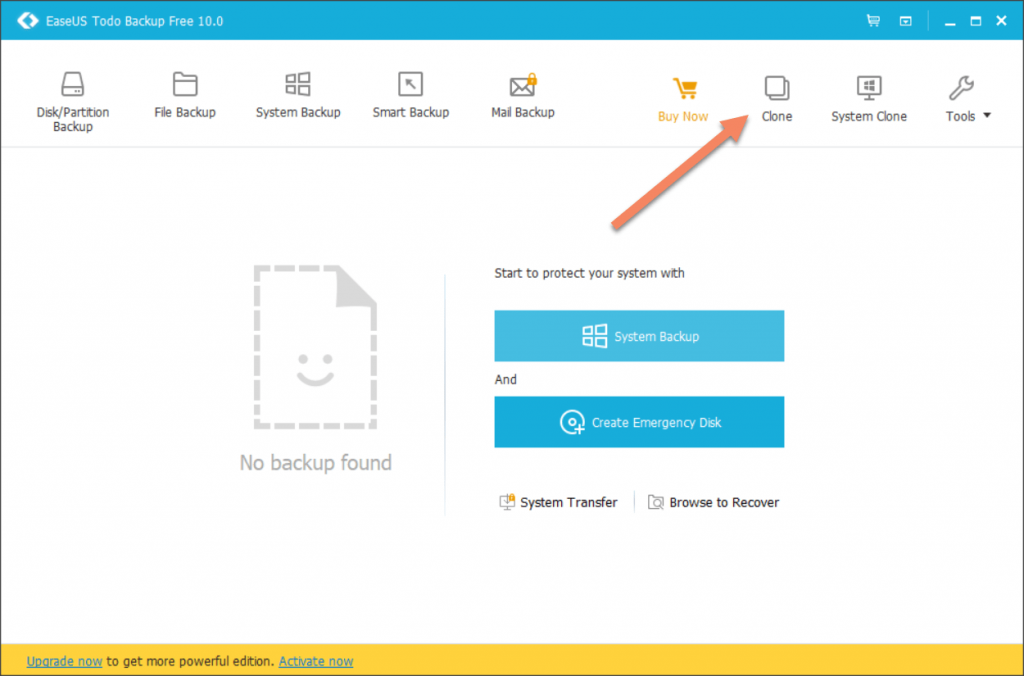
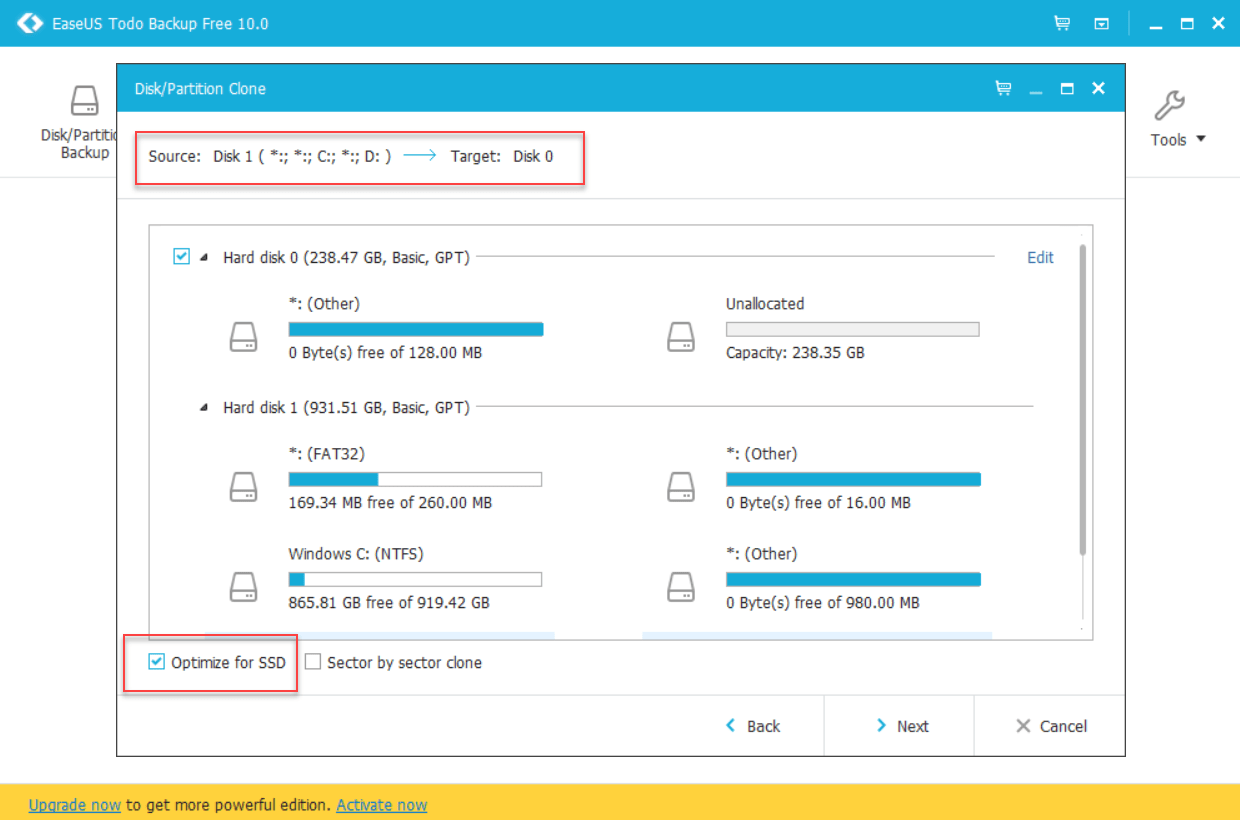
Step 3Choose source and target & start cloning: Launch the Todo Backup tool. Then click on the “Clone” option from the top menu. Once here, you need to choose the Source disk/partitions and the target. As can be understood from the options, the source drive is the disk you are copying from (Hard disk) and the target is your new disk (M.2 SSD).

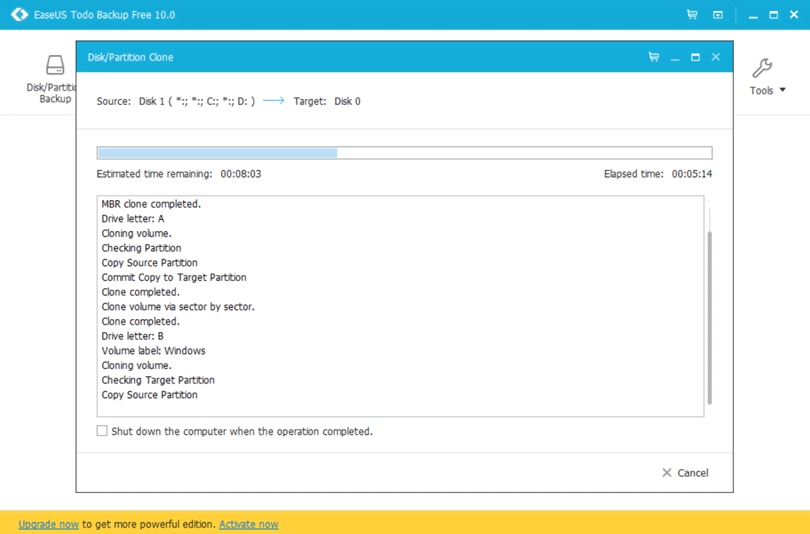
Be sure to check the Optimize for SSD option at the bottom. Click next and accept the warning to start cloning. Your disk will be cloned in a few minutes depending on the amount of data you are transferring.

Be sure to verify that all data has been successfully cloned to the M.2. SSD disk. You can then change your boot order so that the system boots from your SSD disk. You can change the boot sequence from the BIOS menu. Please refer to your PC manufacturer’s website to know more about changing BIOS settings. Step 6Delete Windows from your Hard Disk (Optional): You can delete the Windows 10 installation on the hard disk after successfully booting up your system from the SSD. This will free up space on your hard disk by removing the unwanted copy of Windows. You can use the Windows Disk Cleanup tool or the Disk Management utility to remove the Windows 10 installation from the hard disk.
Conclusion
The guide above helps you in moving Windows from your hard disk to the M.2 SSD. This will make your laptop/PC faster and more responsive. Your Windows activation will be kept and you will not lose any data.


Add Comment