Well, many times it happens that you simply copy away Windows DVD, instead of Making an image of it. Later, even if you burn those files to a DVD, you won’t get a Bootable DVD which means that you won’t be able to do a clean install as you don’t have a Bootable resource. Well, if you’re into a similar trouble then you need not worry. Here are a few simple steps to Make a Bootable DVD or a Bootable image from just copied Windows files.
Requirements:
- ImgBurn software.
- Copied Windows files in a folder.
- DVD/Image Burner.
Procedure:
- Download and install ImgBurn. (Skip if you’ve already installed it)
- Load/Open ImgBurn
- Click the ‘Write files/folders to disc’ button.
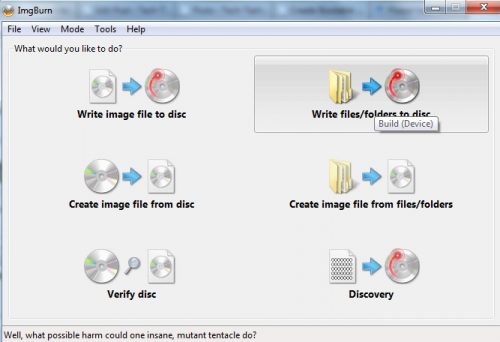
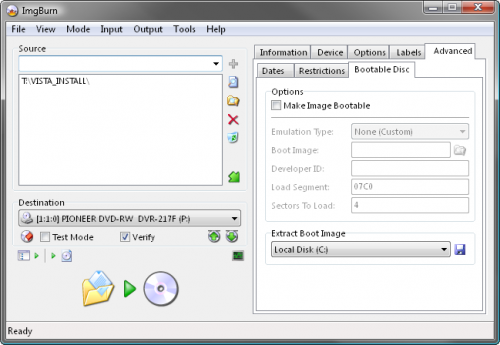
- You should now see a lookalike of following screen:
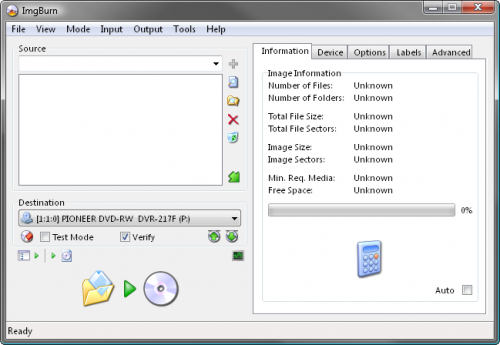
- Insert a blank (or re-writable) DVD disc in your burner.Note: The message in the status bar should now say ‘Ready’. If it doesn’t then there’s a problem with your Disc.
- Add the installation source folder to the ‘Source‘ box by selecting ‘Browse for a folder‘
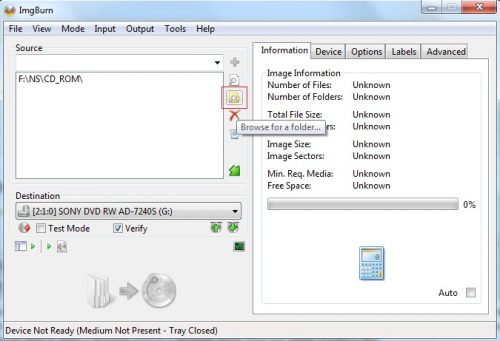
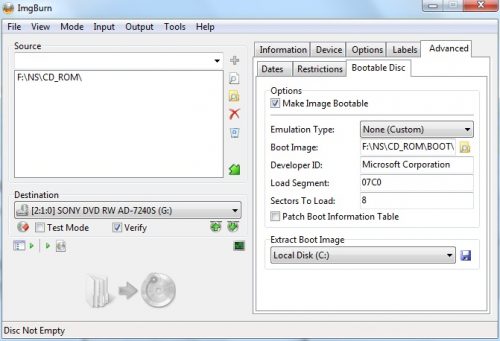
- Switch to the ‘advanced’ tab at the right pane and then to the ‘Bootable Disc’ tab.
- Enable the ‘Make Image Bootable‘ option.
- Set the ‘Emulation Type’ to ‘None (Custom)‘.
- Point the ‘Boot Image’ to the ‘etfsboot.com‘ file within the ‘boot’ folder in your source folder. (In my case, its “F:NSCD_ROMBOOTETFSBOOT.COM“. It will differ for you.
- Enter ‘Microsoft Corporation’ in the ‘Developer ID’ field.
- Enter ’07C0′ in the ‘Load Segment’ field.
- Enter ‘8‘ in the ‘Sectors To Load‘ field.
- You’re done configuring. Click the big Build Button now.
- Assuming your source folder is in order (i.e. it contains a ‘sources’ folder with an ‘install.wim’ file in it) and depending on your current settings, the program will prompt to correct certain things so they match (as closely as possible) an official Microsoft disc/image.
- Click ‘Yes’ to whatever it says needs correcting – these settings have been tried and tested so they will surely work!
Still having issues? Leave a comment!

