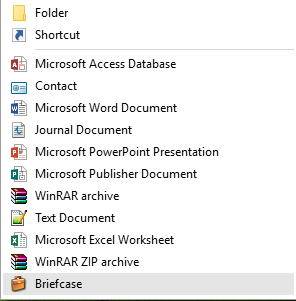
The first question which comes in mind is that ” What is Briefcase feature and how does it works ?”
The answer to this question is this. Briefcase feature is used to synchronizes files and folders within itself with those in any other folder, even on a removable writable media or the network. The users with portable media or multiple computers are mostly using this feature. Using this feature is very simple, users only need to use Windows Explorer and then drag or copy their files into the Briefcase once. Any further changes to either the files on disk or those in the Briefcase are synchronized whenever the user right-clicks on the briefcase and selects Update All. If there are differences between the copies, the Briefcase shows a dialog box with an icon and a description indicating the action it will take when synchronizing; that is, whether it will replace the copy in the Briefcase with the external file or vice versa. The action the Briefcase will take is configurable by right clicking the icon. For example, users can skip synchronizing individual items by selecting the Skip action upon right clicking the icon. For items deleted in either the Briefcase or the main original folder, the Briefcase can create a copy of the missing item. Users can also sync individual items in the Briefcase by selecting the item first and then clicking the Update button instead of Update All. To enable this feature in Windows 10, follow the given steps.
Step to Enable Briefcase Feature in Windows 10
- Download this registry file from here.
- Double click on the downloaded registry file, and select “Yes” to grant it permission.
- Now another dialog box will appear giving a warning message. You can ignore it and click on “Yes”.

Warning Message - Now another dialog box will appear saying the the following message.

- That’s it. Now refresh 2-3 times and right click any anywhere on desktop and select new. You will see the Briefcase option.

After 
Before
Step to Disable Briefcase Feature in Windows 10
- Download this registry from here.

- Follow the same instruction from 2-5 given above.
This method should be working on windows 8 and 8.1 also. If you face any issue then describe it in comment section so that we can help you out. 😀


