Microsoft Edge is the default browser in Windows 10 devices. It did not support extensions or addons when it was introduced. However, it’s been a few months since it started supporting them. That said, the number of extensions available for Edge are limited. The numbers are nowhere close to the likes of Firefox or Chrome which have supported them from long.
That’s acceptable given the fact that Edge is so young as compared to the likes of Chrome or Firefox. The number of available extensions is growing at a steady pace. Many essentials such as Ad Blocker, LastPass, OneNote and others are already available. Extensions for Edge are available from the Windows store. Here’s how to install them and make Microsoft Edge more productive.
Installing New Extensions to Microsoft Edge
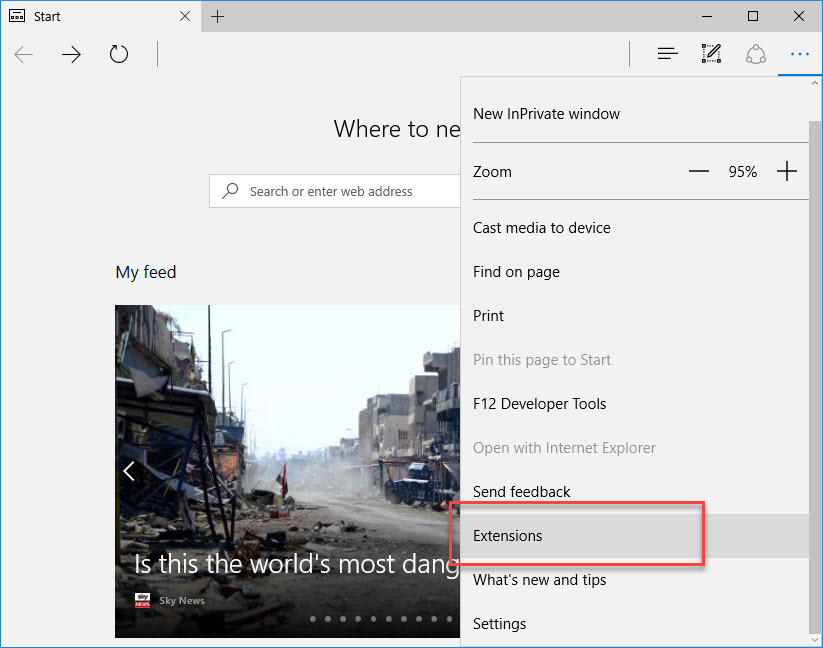
Step 1 – Extensions are available from within Microsoft Edge. You cannot install them directly via the Windows store. So, first of all, open Microsoft Edge and click on the menu button (ellipses or the three dots) in the top-right corner. Then click or tap on Extensions.
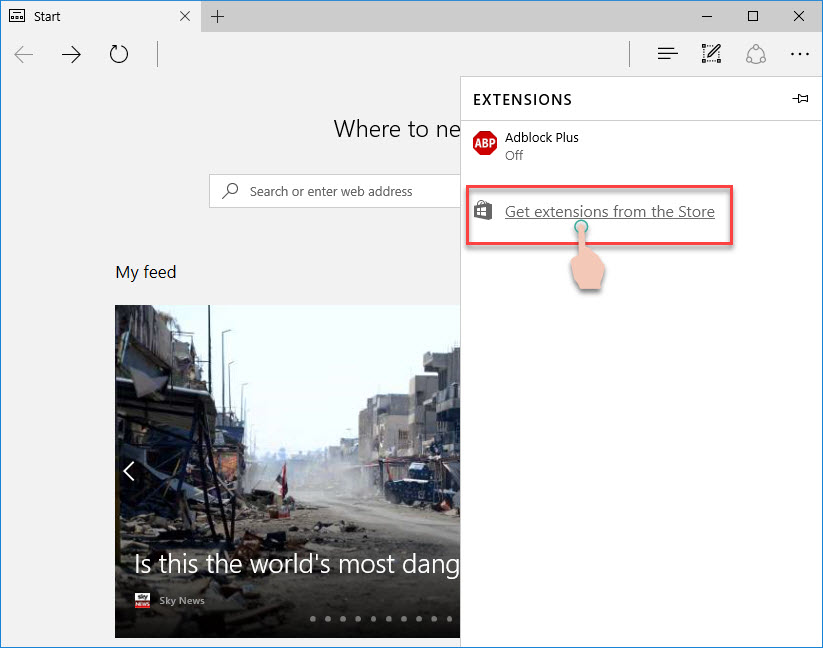
Step 2 – You’ll be presented with the Extensions panel. All installed extensions are listed here. Now, since you’re installing an extension for the first time, the panel will be empty. Simply click on Get extensions from Windows store to install your first Edge extension.
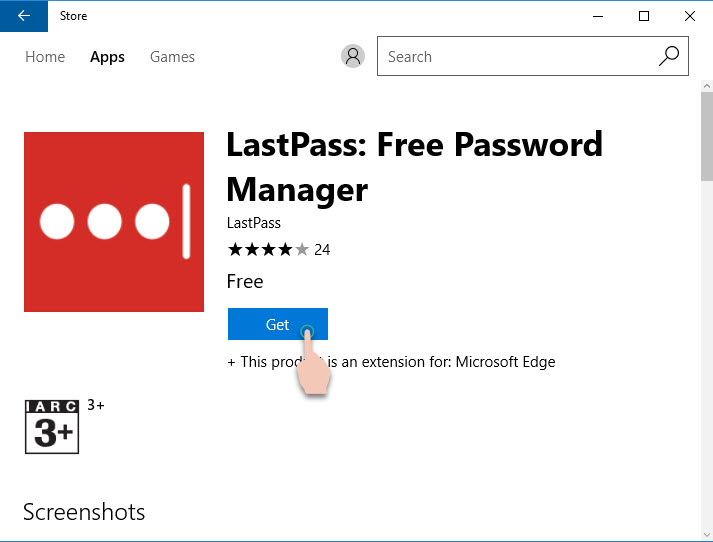
Step 3 – Windows Store will open, listing all available extensions for Microsoft Edge. Browse through the list of search for an extension manually using the search box. Click on the extension which you wish to install.
Step 4 – Click or tap on the GET button to start installing the selected extension. Future updates to the extension will be automatically installed by the Windows Store unless you have updates turned off.
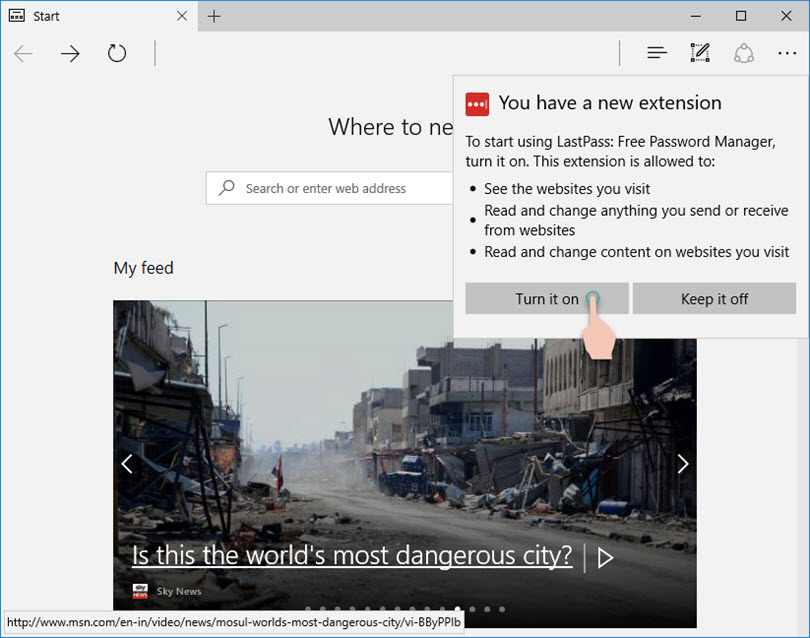
Step 5 – Head back to the Edge browser or click on the Launch button on the extension’s page. Edge browser will display a popup asking if you want to enable the newly installed extension. Click or tap on Turn it on and you’re ready to start using the extension.
If you do not want to read the long text above, here’s the shorter version:
- Open Microsoft Edge.
- Click or tap on Menu (3 horizontal dots) > Extensions.
- Click or tap on Get extensions from Windows store
- Choose the extension to install from the Windows Store and click GET to install it.
- Launch Microsoft Edge and activate the extension by clicking Turn it on.
Configuring the installed extension
Extensions come with their own set of options which allow for customization. Click on the Menu button and select Extensions to open the extensions panel. Now click on the extension you wish to manage or customize.

You can see the overview of the extension here along with permissions and the Options button. Click on options to make user specific changes to the extension.
You can get one-click access to the extension by adding it to the toolbar. This will make the extension icon appear alongside the share, bookmark and other tools. Just right-click (or long tap) on the extension and select Show next to address bar.
How to Turn off or Uninstall Extensions from Microsoft Edge
No longer needing that extension or installed the wrong one? You can easily remove extensions from the Microsoft Edge. You can also temporarily disable the extension while still having it installed for a later use. Here’s how:
- Click on the Edge’s Menu button (top right).
- Select Extensions and click on the extension which you want to Turn off or Uninstall.
- On the extension’s summary screen,
To Turn off – Move the toggle from On to Off
To Uninstall – Click on Uninstall button and confirm by clicking Ok.
This is how you install, manage and remove extensions from the Edge browser. If you make use of the Microsoft Edge browser, do tell us about your favorite extensions you can’t live without 🙂


Add Comment