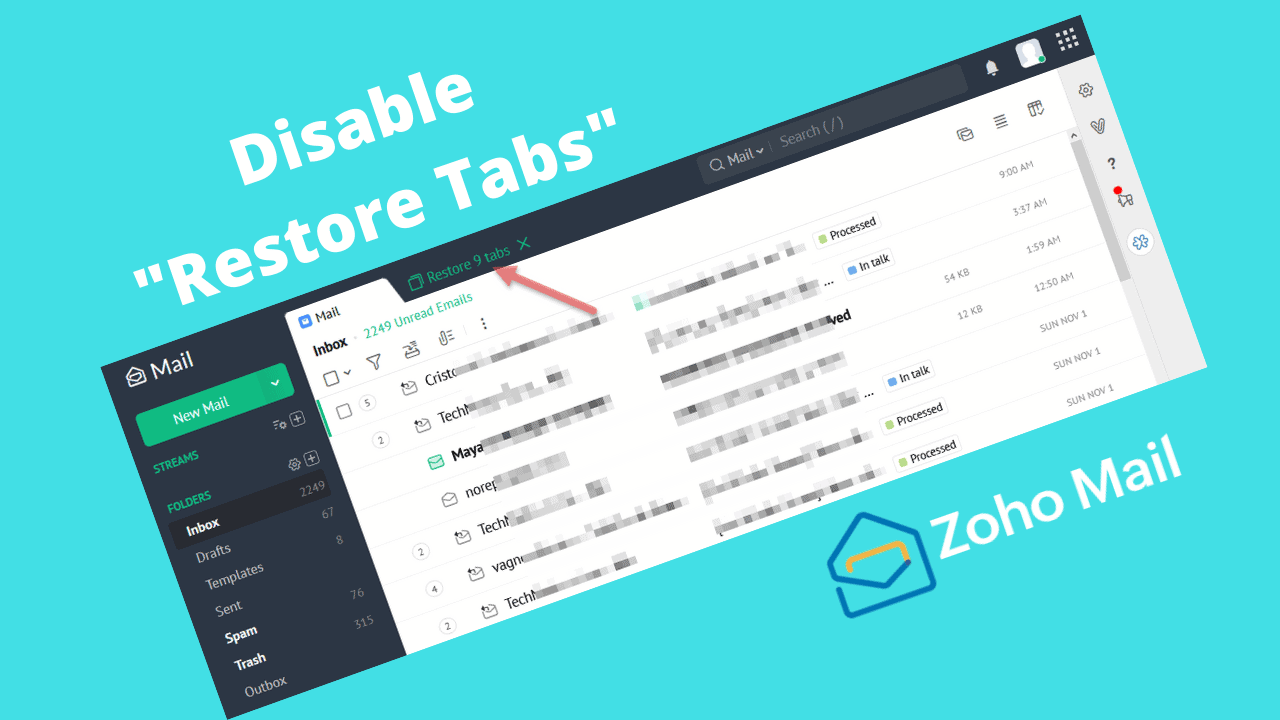
Zoho Mail recently introduced the restore tabs feature in the web version. Essentially, what it does is to automatically restore (or offers to restore) the tabs which were opened in the previous session. The feature can be a big time saver if you work in a lot of tabs and are worried about accidentally losing the open tabs in cases of browser crash or the web page needing a refresh. The feature is also handy when switching devices, such as moving from your desktop to the laptop. You can carry over the currently opened tabs.
However, not all features are useful for everybody. The same goes for Zoho’s restore tabs feature as well. A big downside of the feature is that the platform counts the unrestored tabs from the previous session as a part of the current session. Hence, it greatly limits the maximum number of tabs that you can open in your current session unless you cancel out the restore process. Similarly, a lot of users just open emails read them, and then close the browser. They don’t want to see the emails again. All in all, it can become more of a nuisance for a lot do users. So, in case you have accidentally enabled the Restore Tabs feature and are now looking for a way to disable it, then the following guide will help you.
Set Zoho Mail to start fresh when you log in
It is simple and straightforward to revert Zoho Mail to the original setting i.e. start with the inbox folder and without any open tabs.
- Open Zoho Mail in your PC’s Web Browser. The setting cannot be changed from mobile apps or the mobile version of Zoho Mail.
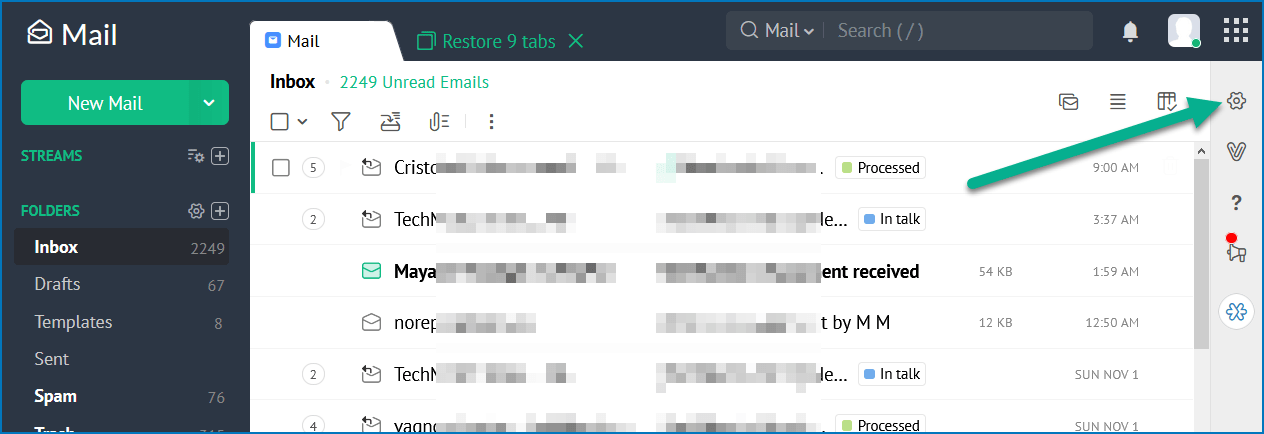
- Click on the gear icon towards the right side of the main UI to access Mail settings.

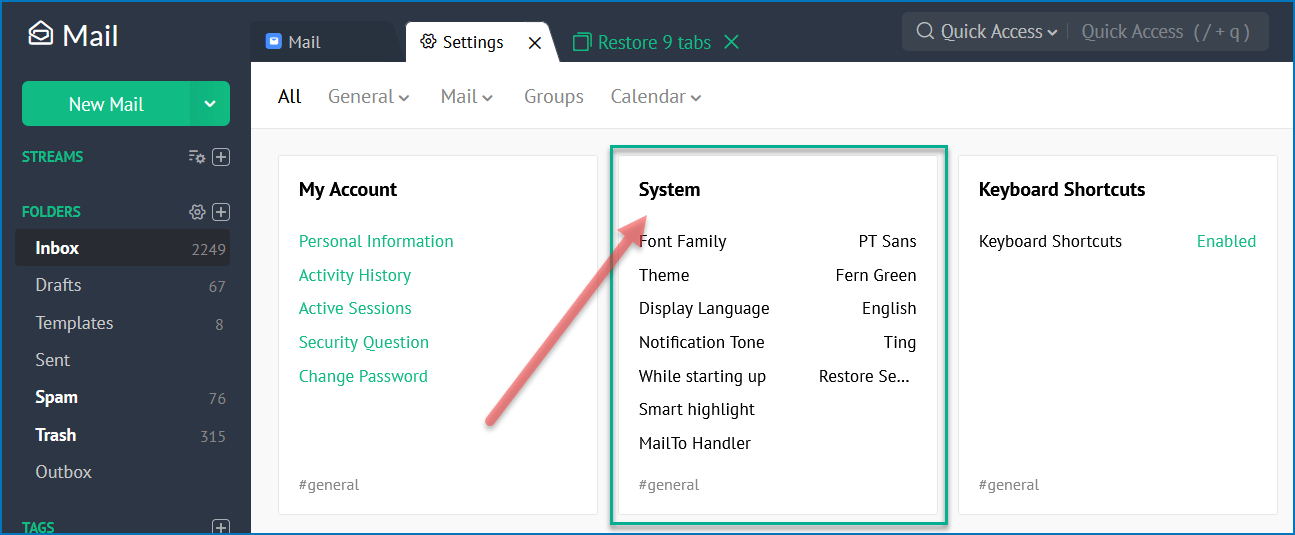
- Now click on the System heading. This is where the startup setting is located.

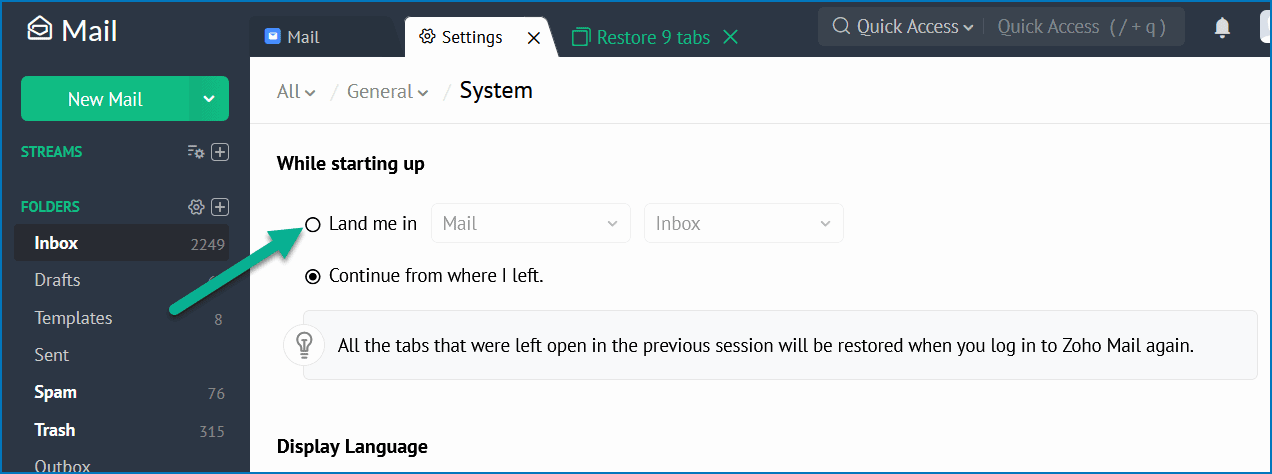
- Change the value for “While starting up” to Land me in “Mail” and select “Inbox” for the folder.

- That’s it. The settings save automatically. You can head back and refresh the webpage to see the new settings in action.
Zoho Mail will no longer restore your previously opened tabs at startup. Now in case you want to enable the setting again, then you can follow steps 1-3 and then select Continue from where I left at step 4.


Add Comment